Guys, if you know me personally or follow me on social media, you’ll know that I’m obsessed with skincare. Like I’m talking 7 step routine obsessed. What can I say? Skin is in.
I’ve always been interested in skincare because I’m not big on makeup. I’ve always loved the look of naked skin and only really started wearing foundation in 2015 – when I was 23, to be precise. When I was diagnosed with rosacea in 2016, I became even more interested in skincare. Because I could see the immediate effect both diet, and a great skincare regiment had.
There’s nothing I enjoy more than learning about the latest skincare technique, new product, or a dermatologist who’s really shaking things up.
One of the most important skincare lessons I’ve learned is how to layer my products. It’s super important when it comes to effectiveness, and not something that’s commonly known. As a rule of thumb, you want to layer your skincare from the thinnest to thickest. So in today’s post, I wanted to get more into that.
Step 1: Exfoliate
I recently read Dr. Harold Lancer’s book, Younger, which taught me about the importance of exfoliating. Exfoliating gently removes the upper layer of the skin, really allowing the rest of your products to penetrate your skin and work their magic.
There are two ways to exfoliate: the first is physical exfoliation, in the form of an exfoliator that has physical particles that gently remove your skin. The second is chemical exfoliation, which is through exfoliators that contain Alpha Hydroxy Acids (AHAs) or Beta Hydroxy Acids (BHAs) which remove the upper layer of skin while providing hydration. They increase our skin’s natural ability to get rid of dead skin cells and speed up the shedding process. The result is plump, youthful skin.
According to Dr. Lancer, you’re supposed to exfoliate every day. It took me a little while to build up to this, starting every other day, until my skin could handle being exfoliated everyday. I would start with every 3-4 days, depending on how sensitive your skin is, and work up from that.
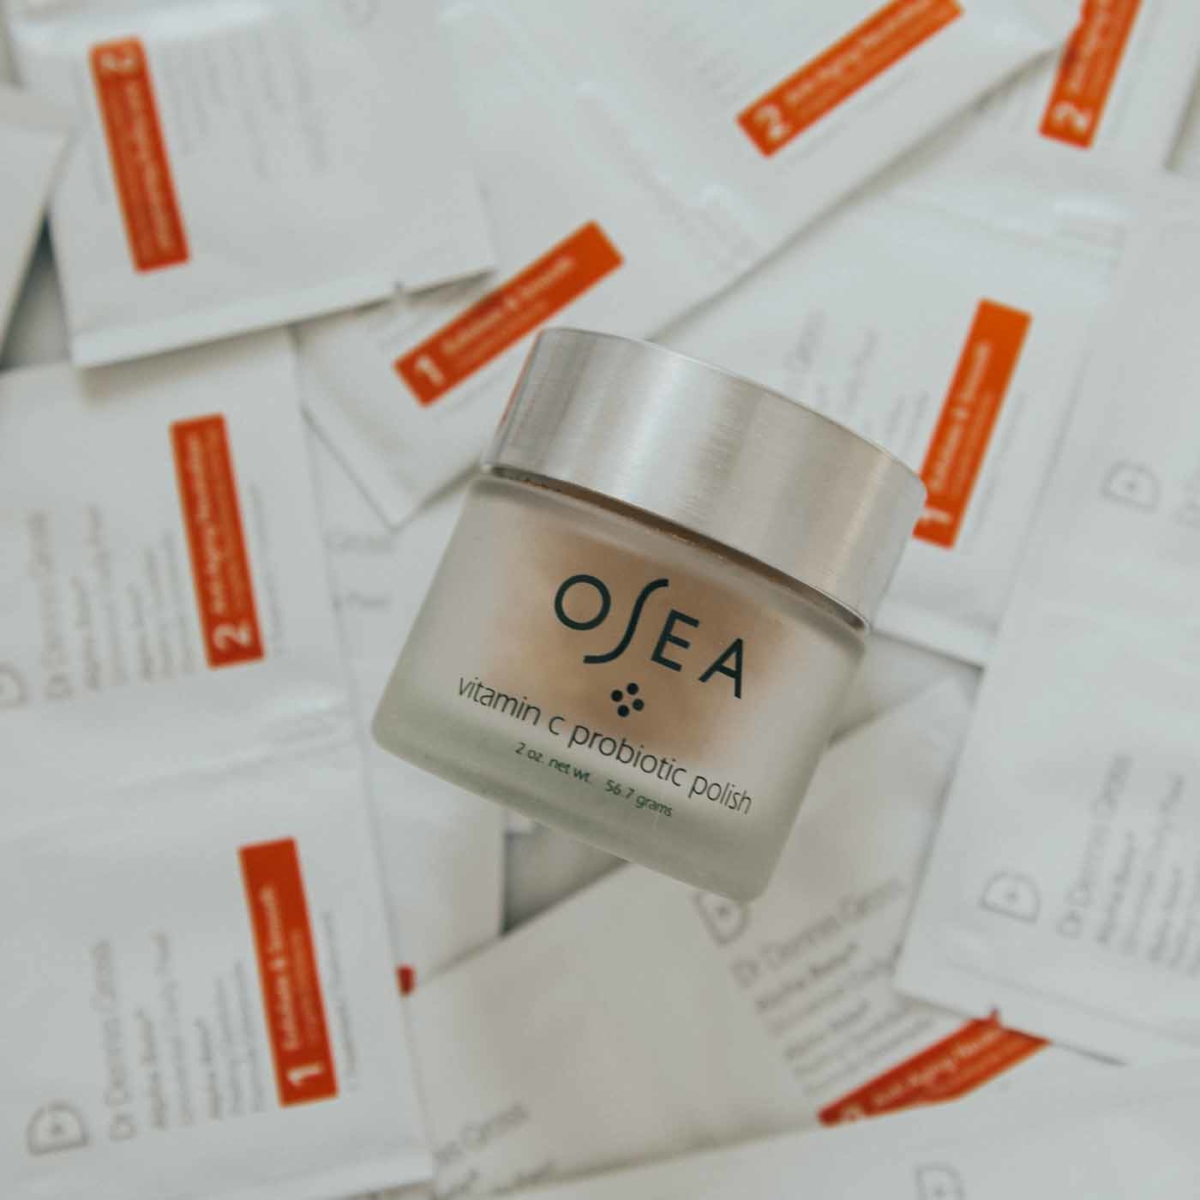
My favourite physical exfoliator is the Vitamin C Probiotic Face Polish from Osea Malibu – it’s all natural and super gentle. Because it contains Vitamin C, it really soothes and brightens your complexion.
In the chemical category, I love the Dr. Dennis Gross Alpha-Beta Peel Pads. Ok so let’s talk about these peel pads. Dr. Dennis Gross is an absolute magician when it comes to skin, and his products are incredibly powerful. Each set of peel pad comes with two different pads – one with AHA (alpha hydroxy acid) and the other with BHA to deeply exfoliate your skin. In addition to this, these peel pads also contain Resveratrol, a potent antioxidant and anti-aging polyphenol which protects the skin against free-radicals.
Step 2: Cleanse
This step is pretty straightforward. You want to cleanse to remove any dirt, gunk or makeup. Not to mention, it makes your skin feel SO fresh! I currently have two favourites which I have to share:
The first is ExfoliKate by Kate Sommerville. This is one of those products that’s truly an all-star. It’s smooth, smells amazing, is effective, and exfoliates while cleansing your skin. I mean, could it be more perfect? So what’s special about this cleanser it’s formulated with a combination of AHAs which exfoliates the skin without drying it out. Also, it removes all impurities. And I mean everything. I’m talking dirt, makeup, literally everything. And it’s non drying, which is totally key. I can go on and on about this cleanser, but in short, it’s amazing.
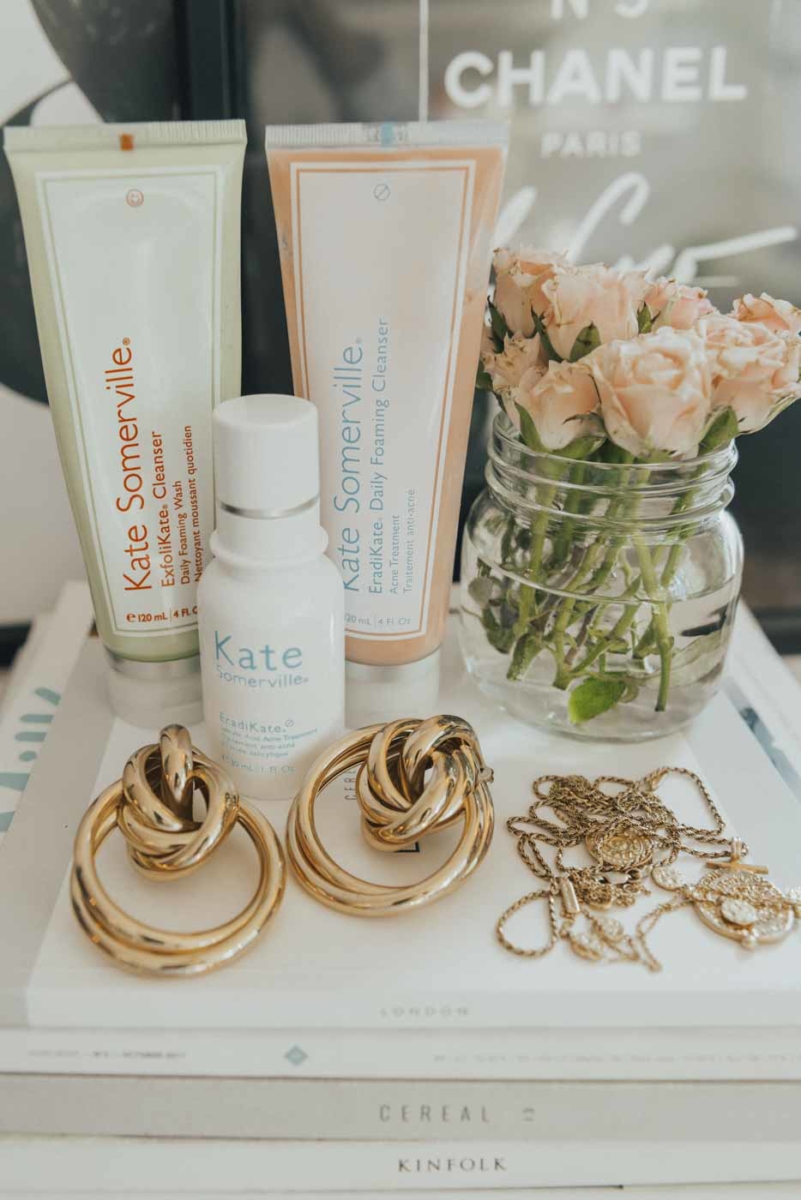
Another great option, also by Kate Sommerville is EradiKate, but this one should only be used if you’re prone to breakouts, or are suffering from a breakout. This cleanser is an absolute miracle worker. I used it when I had a random breakout, and was shocked by how effective it was. It contains 3% acne-busting sulphur, which helps clear breakouts without drying out skin.
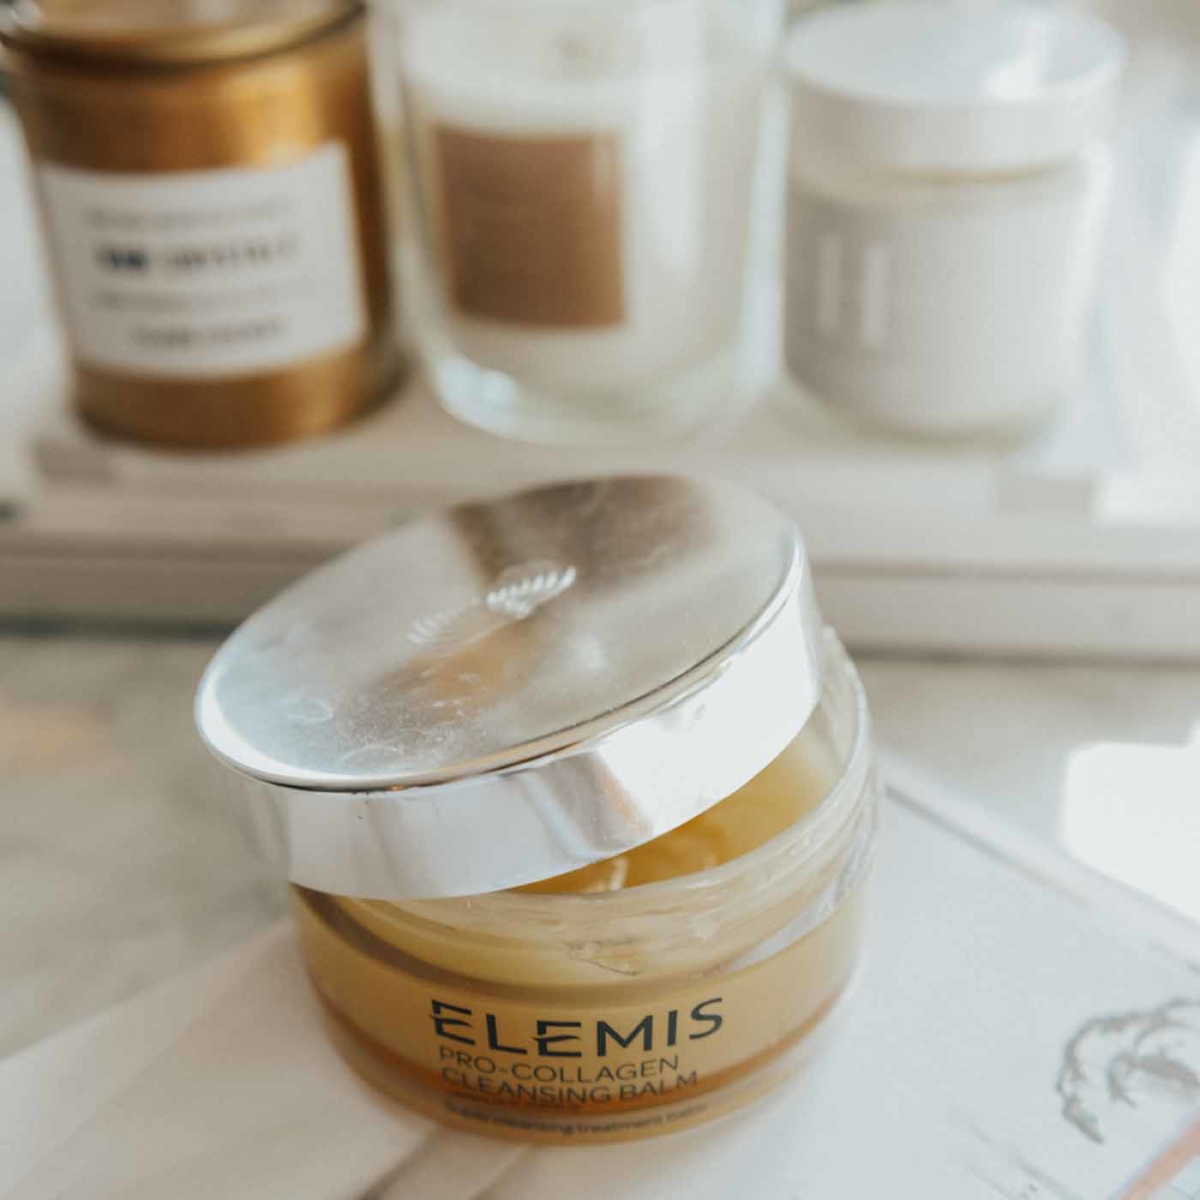
My other favourite is the Elemis Pro-Collagen Cleansing Balm. Guys, where do I even start? So first things first, if you don’t own a balm, you need to change that immediately. The best thing about a balm is it’s magical makeup-removing abilities. Gone are the days of tugging at your eyes with a cotton pad (or worse, a makeup wipe) to get your mascara off. Rubbing your eye area is the worst thing you can do – it promotes fine lines and no one wants that. The Elemis cleansing balm removes every trace of makeup. I’m not joking guys, I could barely believe it the first time I used it. It’s also insanely nourishing and smells like a freaking spa. Try it once and you’ll be hooked. My skin feels softer than a baby’s ass every time I use this miracle-worker by Elemis!
Step 3: Tone
A toner preps your skin for serums and moisturizers. It balances the pH level of your skin and removes any leftover impurities. And guys, the Kopari Coconut Rose Toner is where it’s at.
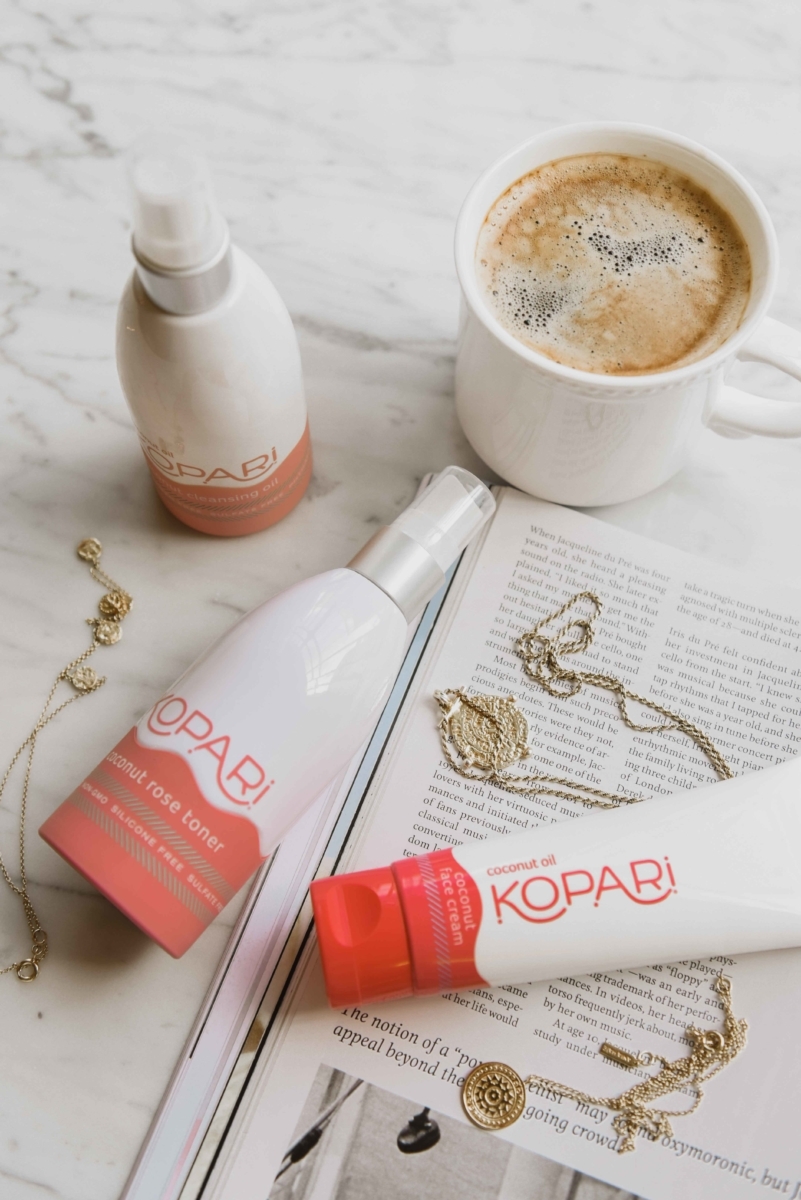
Don’t be fooled by the pretty packaging (although, it really is beautiful). This toner is all-natural, anti-oxidant rich, and hydrates your skin. Not to mention, it smells incredible. It can also be used as a mist for some mid-day hydration. It also reduces redness and the appearance of pores. And the great thing is, you don’t have to break the bank to buy it!
Step 4: Serum
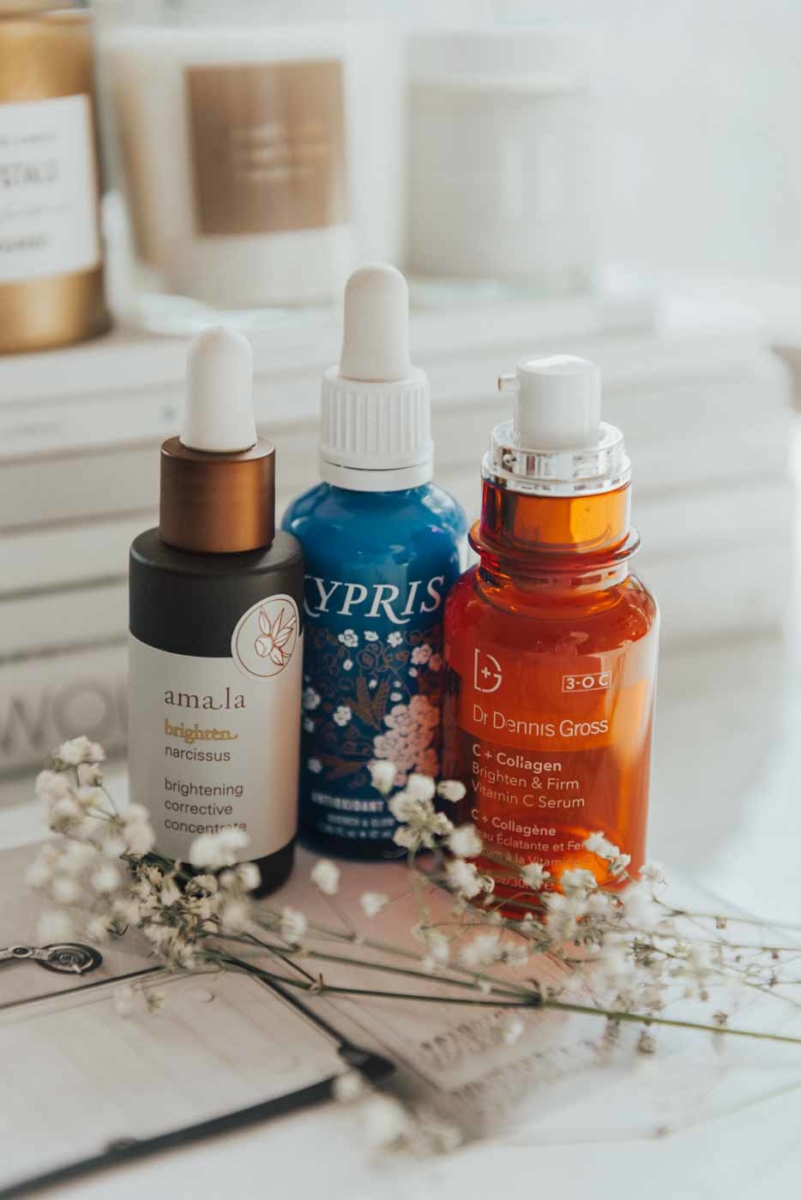
I discussed the importance of serums in this post, but in short, it’s an absolute necessity in your skincare routine. The great thing about serums is that you can definitely layer them. Just remember the thinnest to thickest rule. No serum does absolutely everything. While one may be great for hydration, another may give you a boost of anti-oxidants. That’s why I like to layer.
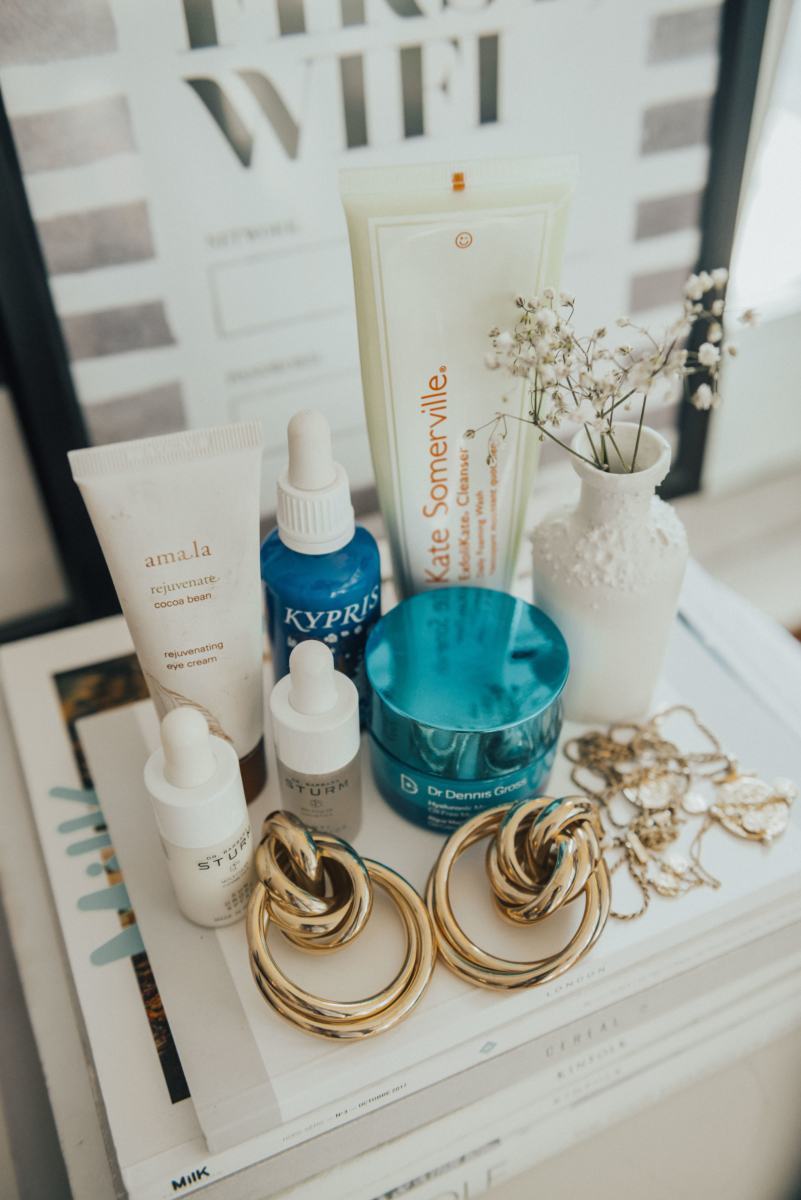
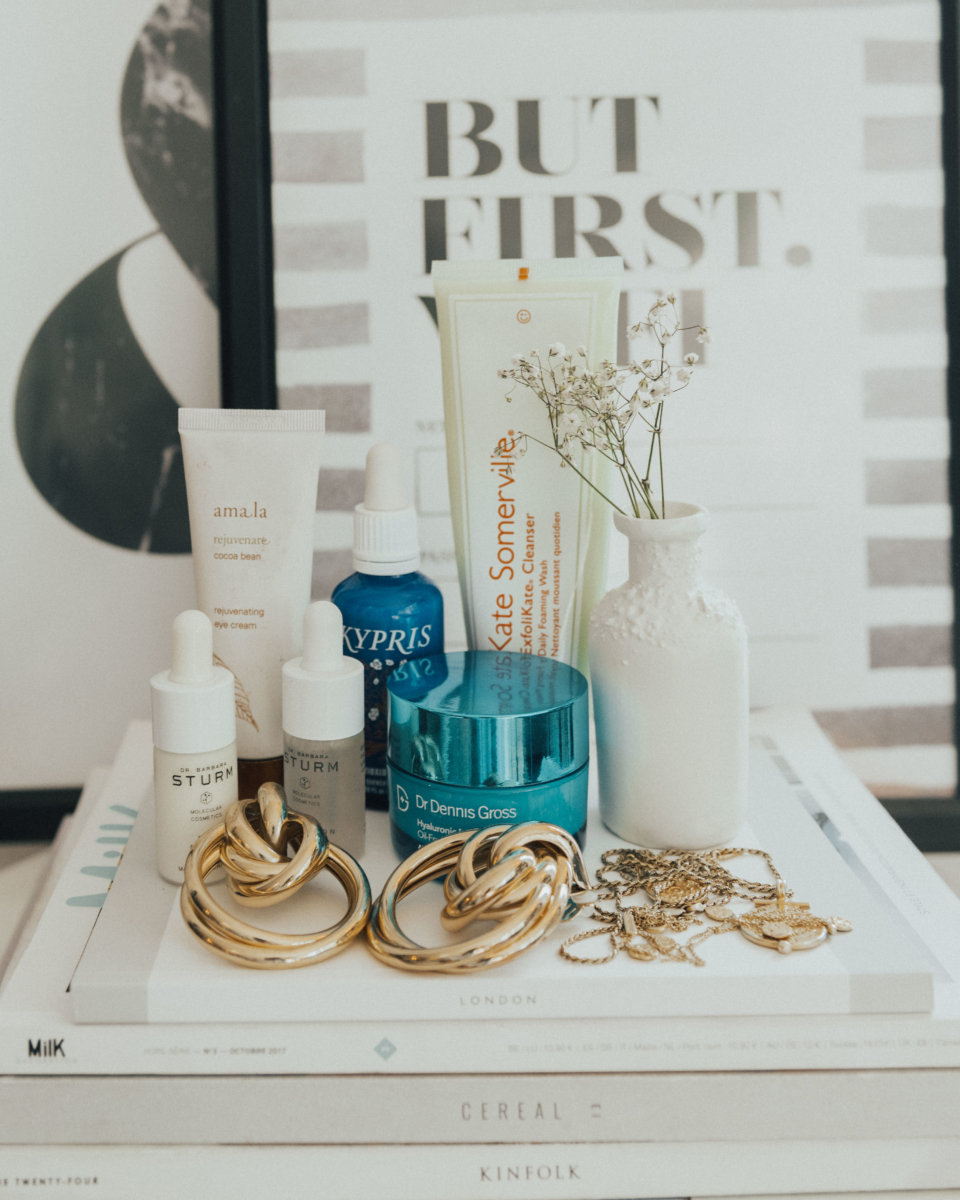
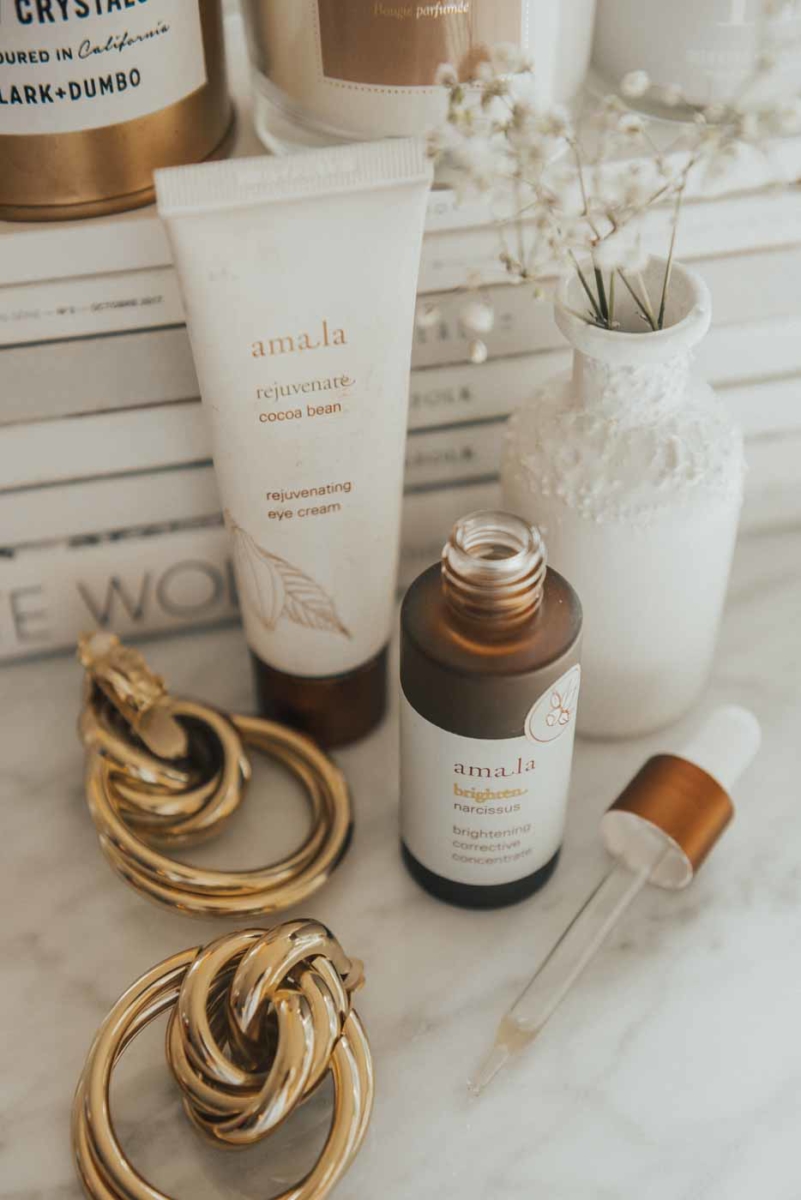
From my previous post on serums (which you can read here and here), the ones that have been on repeat are Dr. Dennis Gross’s Collagen C+ Serum, Kypris’s Antioxidant Dew, Amala’s Brightening Corrective Concentrate, and Osea’s Hyaluronic Serum. But on top of these, I’d like to add one more to your radar.
Dr. Barbara Sturm’s Anti-Pollution Drops. Any good skincare junkie has heard of Dr. Barbara Sturm. But if you haven’t, she’s a genius dermatologist who created a line of incredibly effective products based on her thorough medical understanding of cells and anti-aging. Her products aren’t cheap, but they are 100% worth the extra $$. Her anti-pollution drops are unique because I’ve yet to have come across a product that protects our skin against environmental stressors. Two of the star ingredients in these drops is hyaluronic acid (which is anti-aging because it’s a hydration bomb that holds up to 1000 times its weight in water), and cocoa seed extract which is an anti-oxidant which soothes your skin.

Step 5: Eye Cream
Eye cream is something that you should never skip on, and the earlier you start, the better. After applying serum to your face (and undereye area), finish off with an eye cream. The skin under your eyes is much thinner than any other area of the face. Which means that if you use a regular moisturizer, it would be too much for the area to absorb and may lead to puffiness.
My current favourites are the Caudalie Premier Cru Eye Cream and Amala Rejuvenating Eye Cream. I’ve written about them both here.
Step 6: Moisturize
Now, onto moisturizing. You can either moisturize with a cream, use an oil, or use a moisturizer and an oil after.
I currently have 3 moisturizers which are on rotation. The first is Elemis Pro-Collagen Marine Cream SPF-30. This powerful cream contains 3 variations of algae: padina pavonica, chlorella and porphyridium, which are blended with rose, mimosa absolute and ginkgo biloba. The result is a product which boosts hydration and reduces the look of lines and wrinkles.
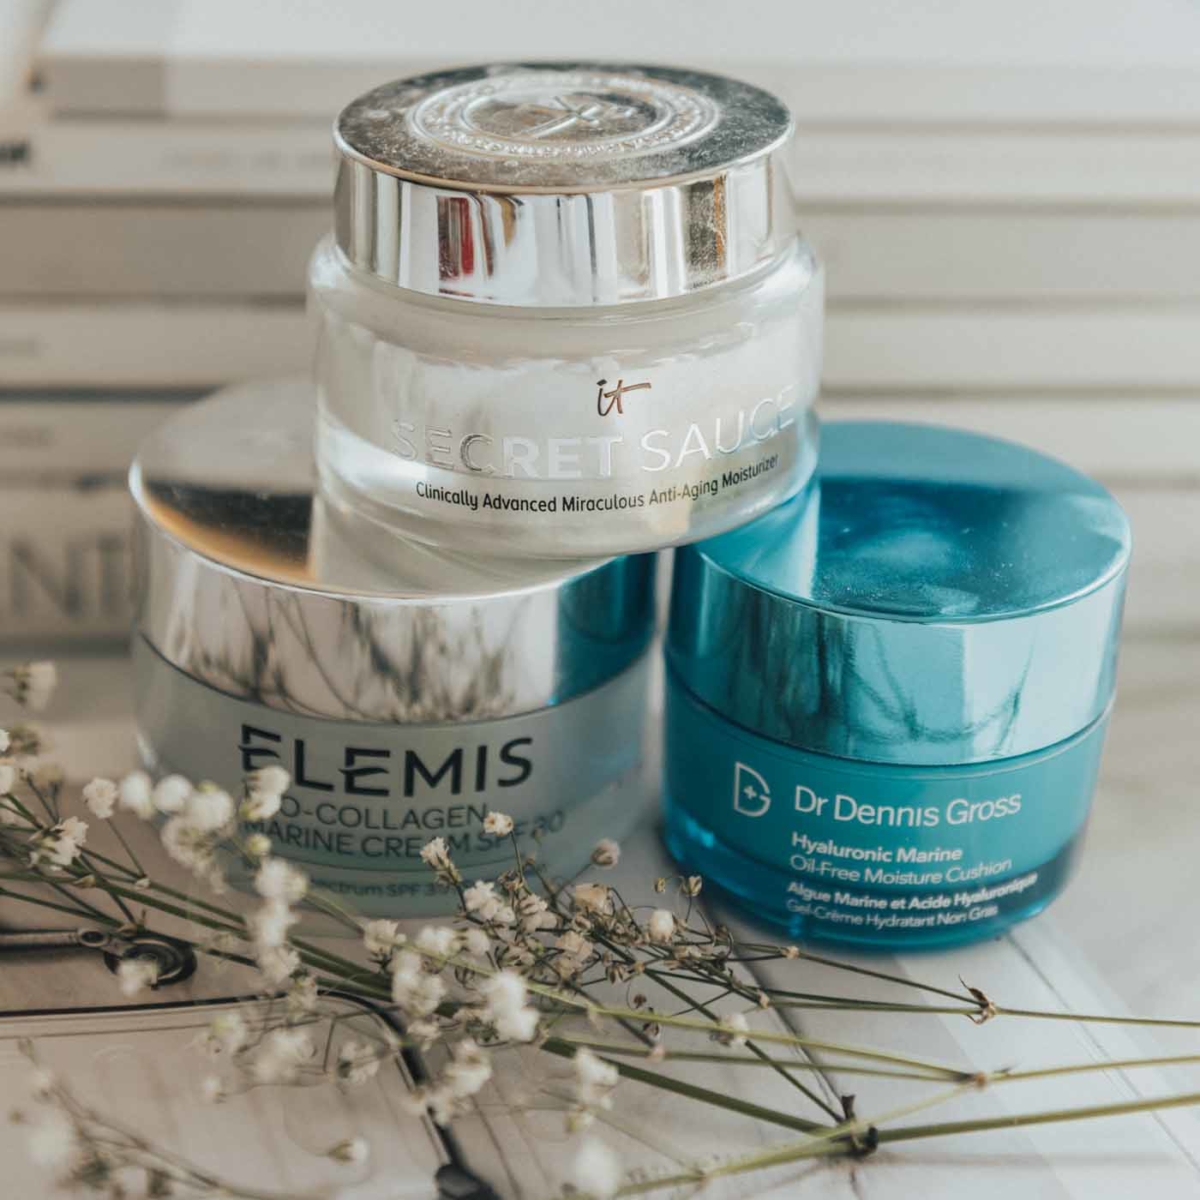
Another superstar product is another one from Dr. Dennis Gross: the Hyaluronic Marine Oil-Free Moisturizer. The marine algae which is a key ingredient in this moisturizer is rich in essential amino acids and B-vitamins, which enhance the skin’s elasticity and moisture content. The hyaluronic acid provides time-released hydration. It has a gel-like texture, is super lightweight and locks in moisture.
Lastly, I’ve been loving It Cosmetic’s Secret Sauce cream as my evening moisturizer and I absolutely love it. It’s thick and extremely moisturizing. It contains collagen peptides, Vitamin C, and hyaluronic acid, so it packs a serious anti-aging punch.
Step 7: Oil
You may choose to do this step or not. It totally depends on your skin type. I personally love oils because they add an extra dose of moisture to my skin. I have 3 which I love.
Although Vintner’s Daughter is a serum, I use it as a last step because it has an oil-based consistency. I’ve written an in-depth post about it in the past which you can read here.
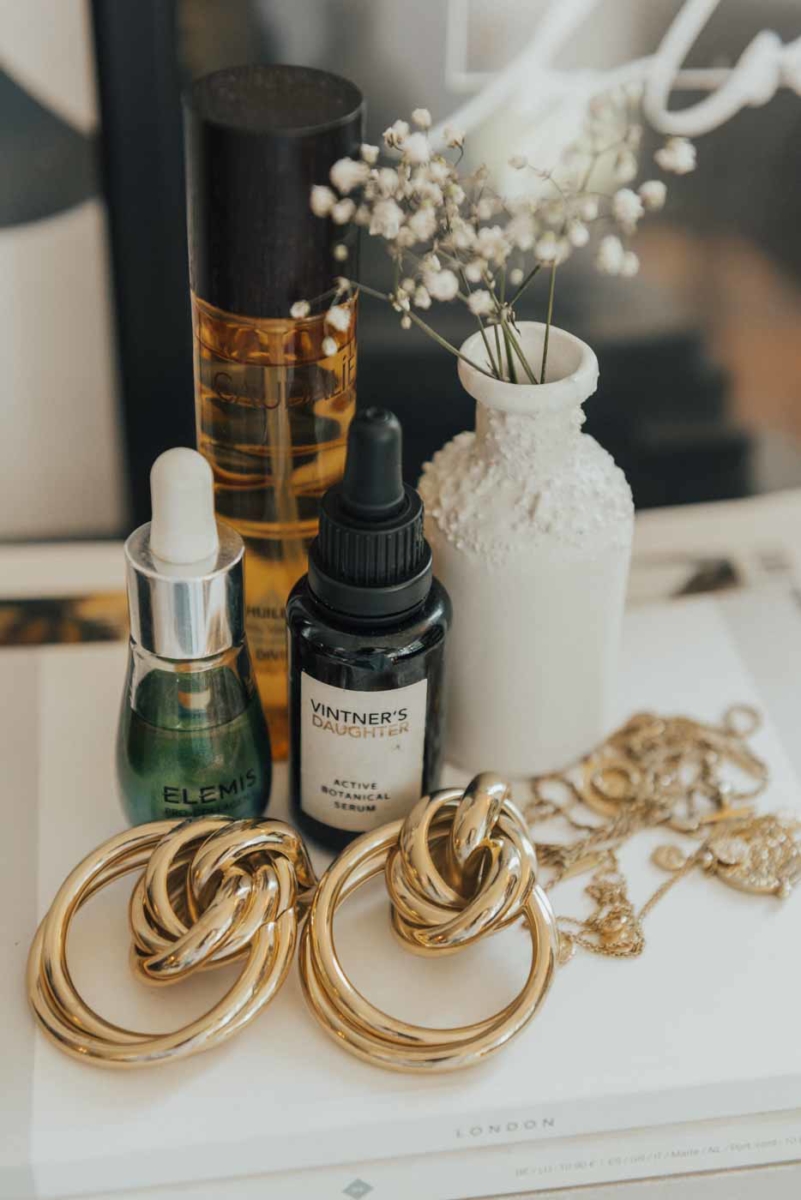
Another incredible option is the Elemis Pro-Collagen Marine Oil. As you’ve guessed by now, I’m a big fan of the Pro-Collagen Marine line in general. The oil is packed with a trio of seaweeds which plump and hydrate the skin.
Finally, the Caudalie Divine Oil. Caudalie is one of those brands that always gets it right. The Divine Oil is a combination of different natural oils such as argan and extra virgin hibiscus, and shea butter. The result is a luxurious multi-purpose dry oil which is nourishing and rich in antioxidant polyphenols.
amazing!
great pix too!
xoxo
Patinka
http://www.patinkasworld.com
This is so on point dear! Yes, exfoliate first before cleansing. Most people tend to forget about the first step. Anyway, looks like you have lots of great products here. Will check some of these. Thanks for sharing!
Jessica | notjessfashion.com